Showing posts with label technology. Show all posts

Saturday, December 29, 2018

How To Protect USB Pendrive With Password

How To Protect USB Pendrive With Password

Today in this computer environment, everything is based on data alteration that you functions within the compact memory storage device that is the memory card, pen drives, and Hard drive etc. But sometimes certain media storage device contains some sensitive data that we might not aspire to share with anyone so at such point, we have to hold our data protected in these manageable drives.

The excellent option is to preserve that drive with a protection like a password etc to keep the data safe in it. So we are here with How To Protect USB Pendrive With Password. By this, you will be able to encrypt your drive and protect your data from being hijacked by any unauthorized person. Just follow up the post below.

How To Protect USB Pendrive With Password

#1 Using BitLocker

Step 1. First of all, insert USB Pendrive into your computer. Now right click on the drive and select Turn on BitLocker.

Step 2. Now click on Use password to protect the drive. Now enter the password you want to set in both the password fields.
Step 3. Now click on next and next and print or save the key for future reference.
Step 4. Now encryption process will start and your drive will get secured with the password that you have set.

also We can Create Usb Security 
2.Wondershare                                                                                  3.DiskCryptor                                                                                    4.Usb Security          


Tuesday, September 11, 2018

Converting VGA analog Video signals to digital HDMI TV signals

Converting VGA analog Video signals to digital HDMI TV signals

CONVERTING VGA TO HDMI


I remember playing around with electronic devices as a kid. Granted, we didn’t have as much to play with back then, but I’ve always been fascinated by electronic gadgets. I’d take things apart and put them back together again. I’d connect different things together to see what would happen; often to the detriment of the things I’d connected together. I guess that’s how I ended up being an engineer.

My son followed in my footsteps, at least as far as the curiosity was concerned. He didn’t become an engineer, but it sure looked like he was headed that way. Any time anything broke in the house, he’d want to take it apart and see what was inside. He had a whole box of components; circuit boards, cables, motors, buttons and lights he’d scavenged from different things. He’d hook them together, just to see what would happen. Of course, what usually happened was a flash and a spark, followed by the faint smell of smoke.

Somehow, we all seem to have this same idea, that we can just hook things together and expect them to work. While some of us learn that it isn’t quite that easy, there are others who keep on trying. If you don’t believe me, just look for adapters on e-Bay sometime. You can find adapter cables to connect just about any two devices that exist. That doesn’t necessarily mean they’ll work; but somebody will be selling them.

What keeps those adapter cables from working is that often the information being transmitted over the cables isn’t the same kind. What I mean by that is that the information which one device uses and the information that another device uses isn’t the same.


VGA Connector
VGA Connector
HDMI connectors
HDMI Type A Connector


Take VGA (video graphics array) and HDMI (high-definition multimedia interface) as an example. Since both of these are for video, it would seem logical that one should be able to connect them together, just by making a cable with the right connectors on both ends. However, nothing is farther from the truth. VGA and HDMI are extremely different systems, that don’t even talk the same language, even though they are both talking about video.

VGA was created as a video standard for computer monitors in 1987. By today’s standards, that’s just about ancient technology. On the other hand, HDMI was created in 2002, making it the most current video connection option available.


So, What’s the Difference Between VGA and HDMI?

Actually, there are lots of differences between VGA and HDMI. The first and probably most important is that VGA uses an analog signal and HDMI uses a digital one. Due to that, running a VGA signal directly into a HDMI connector on a monitor could actually damage it, because the analog signals is at a higher voltage level.


analog video signal
Analog Video Signal
digital video signal
Digital Video Signal


The second difference between VGA and HDMI is that VGA is just video, while HDMI contains channels for both video and stereo audio. So, when you connect them together, you need to bring the audio signal from the device which has the VGA connecter, via a separate cable, and connect it to the HDMI connector.

Another difference is that the wires in a VGA connector and the wires in a HDMI connector don’t match up. You can’t just connect the wire from pin #1 from one to pin #1 on the other and expect it to work, which is what those adapter cables do. In fact, you can’t connect the wire from pin #1 on the VGA connector to any of the pins on the HDMI connector, because they aren’t the same kind of signal.

Of course, the other big difference between the two is the native resolution between VGA and HDMI. When we use the term “native resolution” we’re talking about the actual number of rows and columns of pixels (dots of color) which appear on the screen. Many types of video equipment, from computer cards to monitors to video projectors can receive signals that are a higher or lower resolution, but it will always be presented in that native resolution.

Originally, VGA was created with four different graphics modes:

  • 640 x 480 pixels in 16 colors
  • 640 x 350 pixels in 16 colors
  • 320 x 200 pixels in 16 colors
  • 320 x 200 pixels in 256 colors

That may not seem like much, but the predecessor to VGA was CGA, which only had 320 x 200 pixels. So, stepping up to 640 x 480 was a great improvement. Since then many newer forms of VGA have been developed including:

  • SVGA (super VGA) which is 800 x 600 pixels
  • XGA (extended graphics array) which is 1024 x 768 pixels
  • WXGA (wide extended graphics array) which is typically 1280 x 768 or 1280 x 800 pixels, allowing for wide-screen monitors for movies

All of these different formats (and there are lot more than this) are still considered part of the VGA family. They all use the same D-subminiature connector and any sending device with this VGA connector can be connected to any display device which has a VGA D-subminiature connector.

HDMI, which was developed predominantly for use with HDTV, comes in two basic flavors:

  • 720p, which has 720 horizontal lines of pixels, making the actual resolution 1280 x 720
  • 1080p, which has 1080 horizontal lines of pixels, making the actual resolution 1920 x 1080

As you can see, WXGA and some of the even newer, larger VGA formats have as much resolution as HDMI does, but those aren’t common. Most VGA outputs today are SVGA or XGA, with their lower resolution.

When a monitor can’t display as many lines of pixels as is being presented to it, it either cuts off the edges of the image, or more commonly cuts out some of the rows and columns of pixels, allowing the image to be presented in a way that appears correct. If the monitor has the capability of displaying more lines of pixels than what is being presented to it, it duplicates rows and columns of pixels, making the image larger.

This process of changing the number of lines of resolution from an input signal is called “scaling.” The word scaling essentially means to make it appear the same, while changing the size. Since HDTV has more lines of resolution than a typical VGA signal, it is necessary to scale the signal at the same time it is being converted from analog to digital.


So, How do We get From VGA to HDMI?

It’s clear that a number of different things have to happen, all at the same time, to convert a VGA signal to HDMI; things that require more than connecting the two together. To do this, it is necessary to pass the VGA signal through a converter, which will take the VGA analog video signal and the stereo audio signals and convert them into digital signals which can then be sent out across a HDMI cable for connection to a monitor with a HDMI connector.

These converters “read” the analog signals being sent into them from your computer or other device, then create signals in digital which can be understood by your HDMI monitor. This process happens seamlessly, without any other input from you, other than connecting the device.

At the same time that these devices are converting the signal from analog to digital and from one format to another, they are scaling the image to fit the size and format of the monitor. This can also include the necessary scaling to accommodate widescreen monitor resolutions.

You must be careful when selecting one of these converters to insure that the device has the actual input connectors that you need. Some VGA to HDMI converters have what is known as a composite video input (a round, yellow “RCA” connector), others have a component video input (the three different colored “RCA” connectors), in either case, they’re trying to convert to a digital HDMI output. Although those input types aren’t technically “VGA” they are often referred to as VGA to HDMI converters.

VGA to HDMI converters can vary extensively, the major differences are:

  • Type or types of input connectors accepted (VGA, composite video, component video or S-video)
  • Native resolution accepted
  • The aspect ratio(s) that the converter can work with (standard 4:3 and widescreen 16:9)
  • Whether or not the converter also includes a switcher to allow for multiple inputs (multiple connections doesn’t automatically mean that it can switch between them)
  • Whether or not it has a DVI output connector as well (DVI has the same signal characteristics as the video part of HDMI, without the audio, in a different connector package)
  • Output resolution, 480i, 720p and/or 1080p
  • Power source
  • Whether or not the adaptor has TOSLINK optical digital audio connection capability
  • Whether the settings on the converter are purely automatic, manual, or automatic with manual override capability
How To Troubleshoot HDMI Connection Problems

How To Troubleshoot HDMI Connection Problems


Image result for HDMI


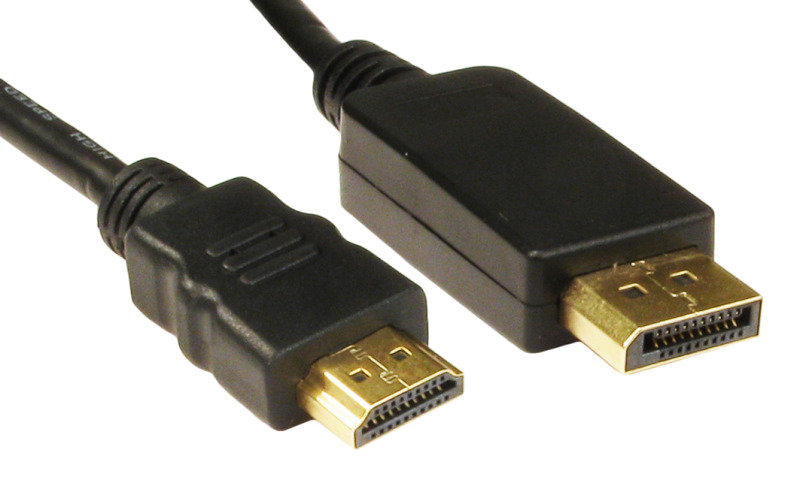
HDMI is the main way to connect multiple components such in a home theater setup, including TVs, video projectors, Ultra HD and Blu-ray Disc players, receivers, media streamers, and even cable/satellite boxes. When an HDMI connection goes wrong, there are some things you can do to that, in most cases, will fix it.


Copy-Protection and the HDMI Handshake
One purpose of HDMI is to make it an easier to connect all your components together by using one cable for both audio and video. However, there is another purpose for the implementation of the HDMI: copy-protection (known as HDCP and for 4K HDCP 2.2). This copy protection standard requires that HDMI connected components be able to recognize and communicate with each other.


This ability to recognize and communicate is referred to as the HDMI handshake. If the 'handshake' doesn't work, the HDCP encryption that is embedded in the HDMI signal is not recognized properly by one, or more, of the connected components. This most often results in you not being able to see anything on a TV screen.

Before frustration sets in, there are some things you can do yourself if you find that your HDMI-connected components are not communicating properly.

HDMI Troubleshooting Tips
Here is a list of the key things you can do to correct HDMI connection problems before letting the panic set in.

Check Your HDMI Cable Connections: HDMI connections don't fit as tight as a component or composite video connections and can slip out sometimes if the equipment is moved slightly. If this is a problem – consider getting locks for your HDMI cables or get self-locking HDMI cables – Buy From Amazon.
Try A Different Turn-on Sequence For Your Components: If you have a habit of turning on your TV first, then your Blu-ray Disc player, or other HDMI source component, try the reverse turn-on sequence and see if that works. Also, if you have a Blu-ray Disc player, or another component, connected to a home theater receiver and then to the TV – try different startup combinations and see if that works. If you find a sequence that works, remember it. Of course, make sure when everything is turned on, and that you have selected the correct input on your TV that the Blu-ray Disc player, or another source component, is connected to.

However, if changing the turn-on sequence of your TV and connected components doesn't seem to do the trick, with both the TV and source component on, just try switching to another input on the TV and then switch back to HDMI and see if the signal locks incorrectly.

Once you have determined the best turn-on sequence – write it down for future reference.


Check Your Source Device's Video Resolution Output Setting: If your Blu-ray Disc player or other HDMI source device has a video resolution output setting menu, check to see if it is set to AUTO. If so, reset it to match the native resolution of your TV or video projector (such as 720p, 1080p, or 4K, if you have 4K-capable TV or video projector) and see if that provides a more stable result.
Use The Process Of Elimination: If you have a Blu-ray Disc player (or another HDMI source) connected to a home theater receiver to a TV and you still don't get anything to show up your TV screen regardless of the turn on the sequence you try, use the process of elimination. Connect the Blu-ray Disc (or another HDMI source) directly to the TV. This bypasses the home theater receiver. See if that does the trick. If so, the home theater receiver, or the HDMI source component/home theater receiver combination is most likely the culprit. What you can do now is keep the HDMI source connected directly to your TV and then make a separate audio connection from your source device (such as a Blu-ray Disc player) to your home theater receiver. This is not necessarily the most efficient connection method, but you can still use the separate video and audio connection workaround a the best option for the time being, or as a permanent solution if you prefer.

Check For Firmware Updates: If you find that none of the above solutions work or work consistently – check to see if there are any announced firmware updates for your HDMI source and home theater receiver (or even your TV) that may resolve this issue. Also, check to see there have been complaints filed or posted by other users regarding HDMI handshake issues with your components.
The HDR Factor
The implementation of HDR on an increasing number of 4K Ultra HD TVs may also cause connection glitches.

If you have an HDR-enabled source device, such as a UHD Blu-ray Disc player or Media Streamer connected to an HDR-compatible TV/Video projector and are attempting to access compatible HDR-encoded content, you may run into a situation where the TV/Video Projector may not recognize the HDR content.


When an HDR TV or Video Projector detects an incoming HDR signal, a brief confirmation indicator should appear on the top left or right corner of the screen. If you do not see this indicator, or see a displayed message by the TV or source component that states that you need to connect the HDR source to an HDR-compatible TV or if a message that states that the incoming signal has been downgraded to 1080p due to the lack of proper HDR detection, there are ways that you may be able to correct this issue.

Make sure you are using Hi-Speed HDMI cables (at least 10.2 Gbps rated - with 18 Gbps preferred).
If you have your HDR source routed through a home theater receiver to a compatible TV/Video projector, make sure your home theater receiver is also HDR compatible.
Access your source device's video resolution output settings and see it is set to AUTO. If so, change the resolution output setting to 4K (sometimes labeled 4K/2K) and see if that corrects the problem. The reason that this problem occurs is that the firmware of the TV/Video projector may not be reading the HDR signal correctly when the video resolution setting output is set to AUTO, so changing the source device's setting to 4K may correct the problem. Check your TV/Video Projector has the most recent firmware update.
If possible, upgrade all your HDMI cables to ones that support 18 Gbps transfer speed. This doesn't make a difference with the handshake issue, but it does solve the problem with any new or future HDMI features you may need.

After changing your settings, and upgrading your cables, if your TV/Video projector is still not recognizing your HDR source, then content tech support for your TV/Video projector, or even your source device(s), and see if they can address the issue.
Troubleshooting HDMI-to-DVI or DVI-to-HDMI Connection Problems
Another HDMI connection issue sometimes arises when it is necessary to connect an HDMI-enabled device to a TV or monitor that has a DVI connection, or a DVI-enabled source device to an HDMI-equipped TV.

In this case, you need to use an HDMI-to-DVI conversion cable (HDMI on one end – DVI on the other) or use an HDMI cable with an added HDMI-to-DVI adapter or a DVI cable with a DVI-to-HDMI adapter. Check out examples of DVI/HDMI adapters and cables on Amazon.com

The added requirement is that the DVI-equipped device you are connecting is HDCP-enabled. This allows the proper communication between both the HDMI and DVI devices.

One other thing to point out is that where HDMI can pass both video and audio signals, DVI connections can only pass video signals. This means if you successfully connect an HDMI source component to a DVI equipped TV, you still have to make a separate connection to access audio. Depending on the TV, this may be done either via RCA or 3.5mm audio connection.

Ordinarily, there should not be a problem converting HDMI to DVI, but there can be. For example, you will find that 3D and 4K signals are not compatible. With standard 480p, 720p, or 1080p resolution video signals, most of the time this is successful, but you may have the experience where some adapters and conversion cables don't work as advertised. If you encounter this problem, it may not necessarily be the TV or another component. You may have to try a couple of different branded adapters or cables.

You may also run into a situation on older-DVI equipped TVs, even if they are HDCP compliant, may not have the proper firmware to recognize the identity of the HDMI source component you are trying to connect. If you run into this situation a call to tech support for your TV or source component is a good idea before proceeding further.

Connecting Your PC/Laptop to a TV Using HDMI
With more consumers using their PC or Laptop as a home theater source component, problems can arise when trying to connect an HDMI-equipped PC/Laptop to an HDMI-equipped TV. Make sure that you go into your PC/Laptop settings and designate HDMI as the default output connection. If you can't get an image from your laptop to show up on your TV screen, try the following:

Try booting up your PC/Laptop with the HDMI cable connected to a TV that is on.
You can try booting up the PC/Laptop while the TV is off and then turn on the TV.
If the above options don't work, try booting up the PC/Laptop first, and, with the TV on then connect the HDMI cable to both the PC/Laptop and TV.
If you unsuccessful connecting your PC to your TV using an HDMI cable, if the TV has a VGA input, you may have to use that instead.

HDMI Without Cables
Another form of HDMI connectivity that is available is "Wireless HDMI". This is most commonly done by an HDMI cable coming out of source device (Blu-ray Player, Media Streamer, Cable/Satellite Box) to an external transmitter that sends the audio/video signal wirelessly to a receiver, that, in turn, is connected to a TV or video projector using a short HDMI cable. Currently, there are two competing "wireless HDMI" format, each supporting their own group of products: WHDI and Wireless HD (WiHD).

On the one hand, both of these options are intended to make it more convenient to connect HDMI sources and displays without an unsightly HDMI cable (especially if your TV or video projector is across the room). However, just as with traditional wired HDMI connectivity, there can be "quirks" such as distance, line-of-site issues, and interference (depending on whether you are using WHDI or WiHD.

Also, there are differences on how both methods may be implemented on a brand and model level, such as whether some surround sound formats and 3D can be accommodated, and, most "wireless HDMI" transmitters/receivers are not 4K compatible, but, as of 2015, this is starting to be implemented.

If you install a "wireless HDMI" connection option and you find that it is isn't working properly, the first thing to do is try changing the position, distance, and component turn-on sequence and see if that solves the problem.

If you find that following those setup that issue cannot be resolved, contact Tech Support for your specific "wireless HDMI" connection product. If that still does not solve the problem, the "stability" of a traditionally wired HDMI connection setup might work best for you. For long distances, there are also additional HDMI connection options to consider.

The Bottom Line
Love it or hate it, HDMI is the default interface used for connecting home theater components together. It was originally designed to provide a single, convenient, connection for both audio and video, with built-in copy-protection and the added ability to be upgraded over time. However, due to the fact that both the source and display devices have to communicate and recognize each other and encoded content has to be properly detected, glitches can occur. However, following the practical steps outlined above can solve most HDMI connection issues.

Monday, September 10, 2018

What is Laser Printer.

What is Laser Printer.


A laser printer is a popular type of personal computer printer that uses a non-impact (keys don't strike the paper), photocopier technology. When a document is sent to the printer, a laser beam "draws" the document on a selenium-coated drum using electrical charges. After the drum is charged, it is rolled in toner, a dry powder type of ink. The toner adheres to the charged image on the drum. The toner is transferred onto a piece of paper and fused to the paper with heat and pressure. After the document is printed, the electrical charge is removed from the drum and the excess toner is collected. Most laser printers print only in monochrome. A color laser printer is up to 10 times more expensive than a monochrome laser printer.


IBM introduced the first laser printer in 1975 for use with its mainframe computers. In 1984, Hewlett-Packard revolutionized laser-printing technology with its first LaserJet, a compact, fast, and reliable printer that personal computer users could afford. Since then, laser printers have decreased further in price and increased in quality. Hewlett Packard continues to be the leading manufacturer with competitors including Lexmark, Okidata, and Xerox.

The laser printer is different from an inkjet printer in a number of ways. The toner or ink in a laser printer is dry. In an inkjet, it is wet. Over time, an inkjet printer is about ten times more expensive to operate than a laser printer because ink needs replenishing more frequently. The printed paper from an inkjet printer will smear if wet, but a laser-printed document will not. Both types of printer operate quietly and allow fonts to be added by using font cartridges or installing soft fonts. If your printing needs are minimal, an inkjet printer is sufficient. But if your printing volume is high, consider buying a laser printer.

When buying a laser printer, these are some important features to consider:

Print capacity and speed: Personal laser printers are sufficient for printing an average of 200 pages per week. These are low-end and cost $200 and up. They can print up to eight ppm (pages per minute). A workgroup printer is needed if an average of 1000 pages per week is needed. These print up to 24 ppm and cost $1000 to $6000 and more. Production printers are needed for printing 50,000 or more pages per week. These are quite expensive and are used by commercial publishers. They can print up to 700 ppm and cost $100,000 and up. They can print 24 hours a day, seven days a week.

Resolution: The standard resolution in most laser printers today is 600 dots-per-inch ( dpi ). This resolution is sufficient for normal everyday printing including small desktop publishing jobs. A high-end production printer might have a resolution of 2400 dpi. Some laser printers still use a resolution of 300 dpi. This resolution can cause jagged lines to appear on the outer edge of an image. Hewlett Packard created RET (Resolution Enhancement Technology) to correct this. RET inserts smaller dots at the edges of lines and to smooth the rough edges. RET does not improve the resolution, but the document looks better. If you purchase a printer with 300 dpi, make sure it has RET.

Printer languages: Printer Control Language ( PCL ) is the standard printer language for Hewlett Packard and most other laser printers (which are mostly HP-compatible). PCL is used for printing letters, database printouts, spreadsheets, and simple graphics. Postscript printers are used with desktop publishing software and drawing packages. Postscript printers are the norm for Apple Macintosh printers. A laser printer that comes with Postscript installed is more expensive. A laser printer that uses PCL can be upgraded to Postscript by installing a software driver provided by the manufacturer of the laser printer. The printer might require more memory when upgraded to use Postscript. This is because a laser printer needs the entire image in memory before printing, and a Postscript printer requires more memory to process than a PCL printer does. The application being used must support Postscript in order for the laser printer to print Postscript documents.

Paper handling: Paper handling is important when shopping for a laser printer. Most laser printers use letter-size, cut-sheet paper. High-end production printers use continuous sheet paper. Laser printers can print on transparencies, adhesive labels, and lightweight cards. A laser printer with duplex printing can print on one side of the paper, turn the paper over, and print on the other side. Most laser printers, however, use simple printing with manual duplex printing. Manual duplex printing is achieved by changing the print options in the printer's properties or printing one side and taking that same paper and reinserting it into the printer to print on the other side.

FPOT and warm-up time: A final consideration in purchasing a printer is FPOT (first paper out time) and warm-up time. When a laser printer receives data from the computer to print, it takes 5 to 30 seconds to prepare the printer to print a new job. This is in addition to the time it takes to actually print the document. The warm-up time is as important. When the printer is turned on, it needs time to warm up the fuser to operating temperature. If the printer has a standby mode or is turned off between printing jobs, the warm-up time becomes even more important. Large workgroup and production printers can take 5 to 15 minutes to warm up. This waiting period can hinder overall productivity.

Monday, June 11, 2018

How to Use a Chromecast as a Quick Information Dashboard

How to Use a Chromecast as a Quick Information Dashboard

If you’ve got a Google Chromecast, why not make mornings easier by turning your TV into a dashboard that shows you things like local weather and traffic, news, and even your to-do list?


Google’s Chromecast platform has become a bona fide hit in the home theater market, thanks to it’s cheap entry point and easy accessibility from almost any smartphone. The gadgets are awesome at simple audio and video streaming, but there are a few more things you can use them for as well, like turning your television into a web-connected dashboard to start your day. It’s a fantastic use of the tech that you already have, and a good habit to get yourself into before work or school.

The Android app we’ll be using to do this is called (appropriately) Dashboard Cast. It lets you configure a set of widgets designed to use a TV’s generous display size to put as much relevant information in a single place as possible. Just set up the widgets however you like, press the Cast button, and send the app’s output to any Chromecast-equipped display.

The implementation is pretty simple, but Dashboard Cast has the tools you’ll need to put news, weather, web content via RSS feeds, and customized reminders on the screen. The default widgets at the time of writing are:
Clock: tells the time
Weather: gathers National Weather Service data for your phone’s location
RSS widget: scrolling text and images from any RSS feed
Calendar: shows upcoming events from your personal Google calendar
Stock: updating info from manually-inputted stock picks
Map: a live updating Google map, complete with weather and traffic data if available, for any point in the world
Music: streaming music from any online MP3, OGG, or M4A stream or playlist. Also includes BBC music stations.
Note: text notes input directly into the app
The presentation may be simple, but it offers enough options to allow a surprising amount of customization. If you want a Spartan all-white look, that’s easy enough, but you can also cycle photo backgrounds, as well as use custom colors and transparencies for the various widgets. You can even load up your own background images from Google Photos, Flickr, or Imgur.


The coolest feature in Dashboard Cast is the ability to automatically cast to a television based on an alarm. In the left-hand settings column, tap the “Alarm” option, and then set the time that you wake up in the morning. The app begins casting at the appointed time—if your television is set to to automatically turn on when it receives the appropriate input, it will be waiting for you just like your coffee maker.

What Is SIM Card, Full Form Of SIM Card

What Is SIM Card, Full Form Of SIM Card

A Subscriber Identity Module (SIM) card is a chip inside most modern cellular phones that stores information your phone needs to communicate with your carrier’s cell towers. SIM cards come in different sizes and if you were to remove the SIM card from your phone you wouldn’t be able to text, call, or access anything on the internet.
What Is A SIM Card?
Believe it or not, SIM cards have been on the scene since 1991. They were first developed by a German manufacturer for a Finnish mobile carrier. Billions of SIM cards have been sold to date.


SIM cards are mandatory for phones connecting to the Global System for Mobile communications (GSM) networks, which is the telecommunications standard in over 193 countries that stores identification and security data on the card.


A SIM card is a small smart card made up of embedded contacts and semiconductors that has gone through four sizes over the years:


Full-Size (1FF or 1st Form Factor) was the size of a credit card; 85.6 mm x 53.98 mm.
Mini-SIM (2FF) was drastically smaller coming in at 25 mm x 15 mm first being used in 1996.
Micro-SIM (3FF) made improvements in length with measurements of 15 mm x 12 mm.
Nano-SIM (4FF) is the most recent form and is 12.3 mm x 8.8 mm.

As phones got smaller and thinner, the need for smaller components inside became more apparent. Having a card the size of a credit card inside a device the same size wasn’t realistic. Nowadays, SIM cards have been stripped down, removing almost all the surrounding plastic, and are essentially just a small chip.

Saturday, June 2, 2018

How to Check Your Own Mobile Number : Airtel, Aircel, Docomo, Idea,etc

How to Check Your Own Mobile Number : Airtel, Aircel, Docomo, Idea,etc

Whenever you get a new SIM card, it takes time for you to by heart your own mobile number. Sometimes,you might even forget your own mobile number due to several confusions and you always give a call to your friends or relatives mobile so that you can have a look at your number,its a long process,isn’t it? Well, now on, you can just use the codes in this tutorial to Check your own mobile number for major network providers such as the below given ones, we will actually use some codes that’ll show up your mobile number without wasting much time.,
You just have to open up your phone’s Dialer, type these codes and finally you need to hit the call button or sometimes you just need to type it. You’ll see that a small window pops up giving you the required details (Some carriers ask you to confirm it, just hit “OK” to proceed) . And the best part is that it works even with zero balance as its completely free, even better than calling others to check your mobile number because even that requires currency!

Check Your Airtel Mobile Number-

*121*9#
*140*1600#
*400*2*1*10#
*140*175
 *282#  *141*123#

Check Your Aircel Mobile Number-

*122*131#
*888#
*1#
*234*4#
*131#
Check Your BSNL Mobile Number-

*1#
*99#
Check Your Idea Mobile Number-

*147#
*1#
*789#
*131*1#
*100#
Check Your Reliance Mobile Number-

 *1#
*111#
Check Your Tata Docomo Mobile Number-

*1#
*580#
*124#
Check Your Vodafone Mobile Number-

*111*2#
*555#
*555*0#
*777*0#
*131*0#
Check Your Videocon Mobile Number-

*1#
Check Your Virgin Mobile Number-

*1#

we haven’t tested all these numbers out,but most of them are guaranteed to work. We are looking forward for your comments related to it.Hope you find it informative and useful.Next time you forget your number don’t ask your friend/ relative,just type these codes and you’ll get your mobile number within a second and yo don’t have to waste time looking for alternatives.Its tough to remember all these codes too,so just bookmark our page and share it 😉 Stay tuned for more.

Sunday, May 27, 2018

What is the GDPR Privacy Law and Why Should You Care?

What is the GDPR Privacy Law and Why Should You Care?

he General Data Protection Regulation (GDPR) is a new European Union law that takes effect today, and it’s the reason you’ve been receiving non-stop emails and notices about privacy policy updates. So how does this affect you? Here’s what you need to know.
The new GDPR law takes effect today, May 25th, 2018, and it covers data protection and privacy for EU citizens, but it also applies to a lot of other countries in various ways, and since all the tech giants are huge multi-national corporations, it affects a lot of the stuff that you use on a daily basis.
The Problem GDPR is Trying to Solve: Companies Are Collecting and Abusing Your Personal Info
Since the dawn of the internet, companies have been gathering as much data as possible on anyone they can. It’s simple to collect that information, so there’s no reason for them not to hoard it.

The problem is that over the last few years, lots of companies have been caught failing to protect—or outright abusing—your personal information. The Cambridge Analytica scandal, where a researcher used a Facebook quiz to gather huge amounts of data on millions of Facebook users and then sold it to a consulting firm, is only the most recent example. The Equifax hack last year was particularly bad because the information leaked could be used to open credit cards. And those are just the big scandals. Lots of companies have been misusing your data in smaller ways, like selling it on to third party advertising companies.


The EU has taken a dim view of the situation and is using the GDPR to try and rectify it. Under the new laws, companies that don’t adequately protect consumer data or misuse it in any way face huge fines.
What is Considered Personal Data?
The GDPR protects “personal data,” which here means “any information relating to an identified or identifiable natural person”—and that’s a pretty broad definition. In reality, personal data is generally going to include things like:

Biographical data such as your name, address, phone number, social security number, and so on.
Data relating to your physical appearance and behaviour such as hair color, race, and height.
Information about your education and work history such as your salary, college degree, GPA, tax ID, and so on.
Any medical or genetic data.
Things like your call history, private messages, or geo-location data.
This is far from a complete list. The key is that any data that makes you identifiable counts. In certain circumstances, your hair color may be enough. In others, even your full name—if it’s something common like Robert Smith—might not make you identifiable.

What Does the GDPR Do?
style="background-color: white; color: #292929; font-family: Lora, serif; font-size: 20px;" />The GDPR gives EU residents who are having their personal data collected—called “data subjects” in the law—eight rights. They are:

The right to be informed: If a company is collecting data, they need to tell data subjects what’s being collected, why it’s being collected, what it’s being used for, how long it’s going to be kept, and if it’s going to be shared with third parties. This information can’t be buried deep in a terms of service no one reads; it has to be concise and in plain language.
The right to access: If they request it, any organization that has personal data regarding a data subject must provide it to them within a month.
The right to rectification: If a data subject finds out that a company has data on them that’s incorrect, they can request that it gets updated. Companies have one month to comply.
The right to erasure: A data subject can request that a company deletes any data that is held on them in certain circumstances. For example, if the data is no longer needed or they are withdrawing their consent for it to be used.
The right to restrict processing: If an organization cannot delete a data subjects’ data—for example, because they need it for legal case—then they can request that the company limit how it’s used.
The right to data portability: Data subjects have the right to take their personal data from one service and use it with another.
The right to object: If data is collected without consent but for legitimate business interests, for the public good, or by an official authority, the data subject can object. The organization must then stop processing the data until they can prove they have legitimate reasons to do so.
Rights related to automated decision making including profiling: The GDPR puts into place safeguards so that individuals can object to or get an explanation about automated decisions that affect them and their data.
Another big part of the regulations is that companies must have a lawful reason for collecting or processing any data. One of the lawful reasons is that they’ve obtained consent to use it for a specific purpose, but there are others like they need it to comply with legal obligations or that collecting it is in the public interest.

As you can see, the rights given to EU residents under the law are pretty broad and are forcing companies who collect data from them to really think about what they’re collecting and why. The old days of just collecting everything they can and hoping they find a use for it later are gone—at least in Europe. This is why pretty much every service you’ve ever given your email address to is contacting you.

What’s got a lot of companies in a fuss is that the sanctions for not being GDPR compliant are pretty harsh. An organization can be fined up to €20 million or 4% of their worldwide annual turnover (whichever is greater) under the laws. For the likes of Amazon or Google, this amounts to billions of dollars in potential fines if they mishandle EU residents’ data.

What Does the GDPR Mean for Americans?
Throughout this article, we’ve been focusing on what rights GDPR gives to EU residents for the simple reason that it’s an EU law. It actually doesn’t apply to American citizens, unless they’re also resident in the EU. The reason you’re getting all the emails is that most companies have no way of telling who’s an EU resident and who isn’t.

This, however, doesn’t mean that the GDPR won’t affect you. It’s caused a lot of companies to reevaluate how they’re handling consumer data and some of them have started talking about rolling the GDPR rights out to non-EU residents. And it’s also simpler for companies to enforce a single set of rules for all customers in many cases.

For example, Apple has launched a new privacy portal where people can download all their personal data or delete their account, in other words providing people with the rights of access and erasure. For the time being, only EU based accounts can use it but Apple plans to roll it out worldwide over the next few months. Similarly, Facebook is muttering about giving the same GDPR protections to some users outside the EU.

Sunday, April 22, 2018

What Is YouTube TV ? important things to know before signing up for

What Is YouTube TV ? important things to know before signing up for


YouTube TV, Google’s internet TV subscription service, launched.

It sounds promising, and unlimited DVR powers (plus having those recordings saved for up to nine months) is awesome.

But I’m a nerd who occasionally spends time reading through FAQs and YouTube’s help pages to find the stuff that’s not include in flashy advertising. What I’ve found so far might be helpful in your decision on whether or not to give YouTube TV a (free) try.

Most people can’t get it. Womp womp.

At launch, YouTube TV is starting fairly small. It’s currently available in:

Chicago
Los Angeles
New York City and surrounding suburbs
Philadelphia
San Francisco Bay Area
Live TV from the major broadcasters (ABC, CBS, Fox, and NBC) is a major part of YouTube TV, and arranging deals takes time and can be tricky in cities where those channels are run by affiliates. YouTube has said it’s working to quickly expand availability of YouTube TV.

It’s $35 per month, but signing up from an iPhone or iPad makes the monthly bill more expensive.

Unless you’re really a fan of having the iTunes Store handle all your subscription billing, don’t sign up for YouTube TV from an iOS device. The monthly price jumps to $39.99 (plus taxes and fees) if you do. Normally — if you sign up from Android or the web — it’s $35 plus taxes and fees.There’s a free 30-day trial.

That’s a nice long time to try out the service and see if it does everything you want from it. Just know that, as usual, signing up for the trial requires a credit/debit card and will result in a small, temporary authorization on that card.

Don’t sign up from someplace where you don’t live.

Location is a critical factor with YouTube TV. It determines whether you’re eligible to sign up for the service to begin with, and also which local ABC, CBS, Fox, and NBC feeds you see. So don’t rush to activate that free trial if you’re traveling. YouTube says “we recommend waiting to sign up until you return home.”

You can watch on three devices at the same time.

That’s pretty decent among the pack of these internet TV services. Sling TV ranges anywhere from one to four concurrent streams depending on package, DirecTV Now limits you to two, and PlayStation Vue leads everyone with five streams at once.

There’s no Roku or Apple TV app yet. Also, YouTube would prefer that you don’t try to watch live TV with the old, original Chromecast.

YouTube has said that support for other platforms will arrive later this year. For now, you’ll have to use Chromecast (or own a Android TV) to stream YouTube TV on your living room screen. FYI: YouTube cautions that the aging, first-generation Chromecast hardware might “experience a higher rate of errors” than more recent models.

Blackouts are still a headache, especially for sports fans — but also randomly.

YouTube TV faces the same inconvenient restrictions on where and how you can watch things — particularly sports — as its competitors. And the company is very quick to direct the blame towards its programming partners and networks:

If you're trying to watch certain programs, like sports events, you may see a viewing restriction known as a "blackout." Blackouts are set by our content partners, like sports leagues or our network partners. They vary based on your current and/or home area, the content you're trying to watch, what platform or device you’re watching on, and possibly other restrictions made by our partners. Affected programs will be unavailable in YouTube TV. If a blackout is in effect in your location, we will do our best to let you know.

This doesn’t always just apply to sportsball, though. Remember when no one could stream the Golden Globes with Sling TV or PS Vue or DirecTV Now? So does YouTube, and it can’t promise that similar, random blackouts are out of the question here either:

You may occasionally see a total blackout of some programs on broadcast networks.

This happens because YouTube TV is an internet-based service, and digital streaming rights for certain programs are different than traditional TV rights. If a blacked out program appears in your Library, Home, or Live tabs, you'll see an icon alerting you that the program is currently unavailable.

Some content can’t be watched on phones, and some content can’t be casted to the TV screen

This heads up mostly applies to Verizon’s long-running exclusive lockdown on mobile NFL viewing. You won’t be able to watch football on your smartphone, but a YouTube spokesperson told me that you can cast games to the TV screen as a workaround. You can also watch from larger-screened devices like an iPad, Android tablet, or PC without issue.

I’m less clear on where this “certain programs may not always be available through casting” restriction applies with regards to YouTube TV’s launch lineup of channels. When asked for an example, a YouTube spokesperson told me that as of now, everything can be casted.YouTube TV is launching in a fairly small list of cities, and if you’re trying to watch from outside those locations, you’ll be unable to stream the big four broadcast networks live. You will be able to watch the cable networks that are part of YouTube TV without a problem. As for sports, YouTube says that “sports programming can vary widely based on location and content rights.” Good luck, friend.

Also, it won’t work at all internationally. YouTube TV is a US-only service for now. Overseas, you’ll have to stick with regular old YouTube.

Paying for YouTube TV doesn’t remove ads from everyday YouTube.

Okay so, YouTube TV includes YouTube Red’s content and original shows, but it doesn’t remove ads from regular YouTube videos. To do that, you’ve still got to pay $9.99/month for YouTube Red. Remember: YouTube Red includes a subscription to Google Play Music where the on-demand music app is available. Also, I feel like this is common sense, but paying for YouTube Red doesn’t mean you’ll magically avoid commercials when watching live TV.

That’s it for now. I’ll update this if I discover any other potential gotchas or frustrations with YouTube TV.

POPULAR

Facebook

Ads